HowTo: Set up AWS Security Groups
In this short How To you will discover how to set up Security Groups in Amazon Web Services.
All you need for this short guide is an Amazon Web Services account.
Bring up your AWS management console, and on the left navigation pane select “Security Groups”. Next select “Create Security Group”:

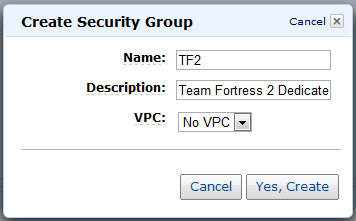
Now you need to give your Security Group a short name, and a description:
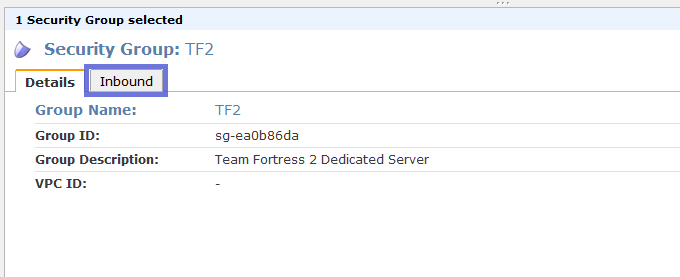
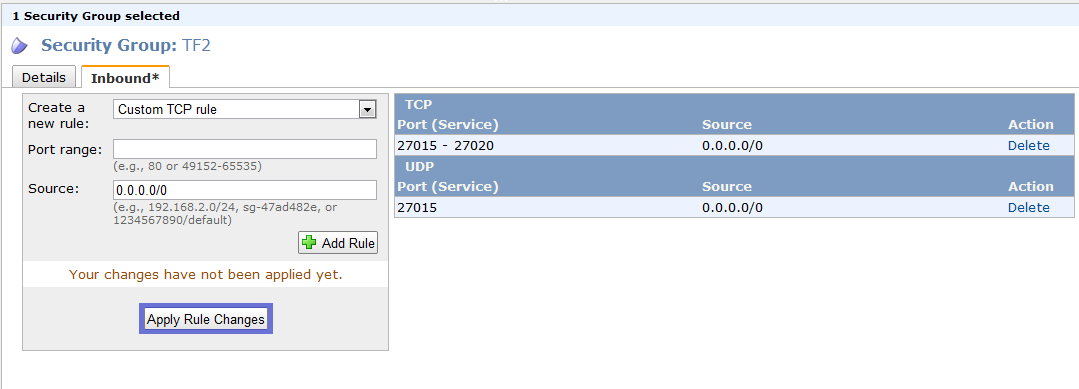
Next, click the “Inbound” tab:
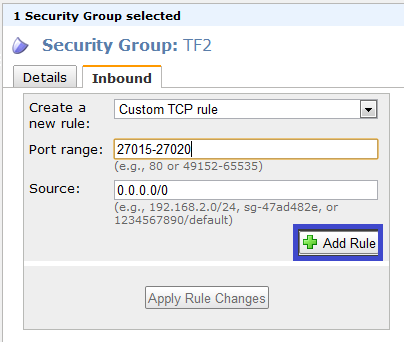
And add a Custom TCP Rule and Add Rule:
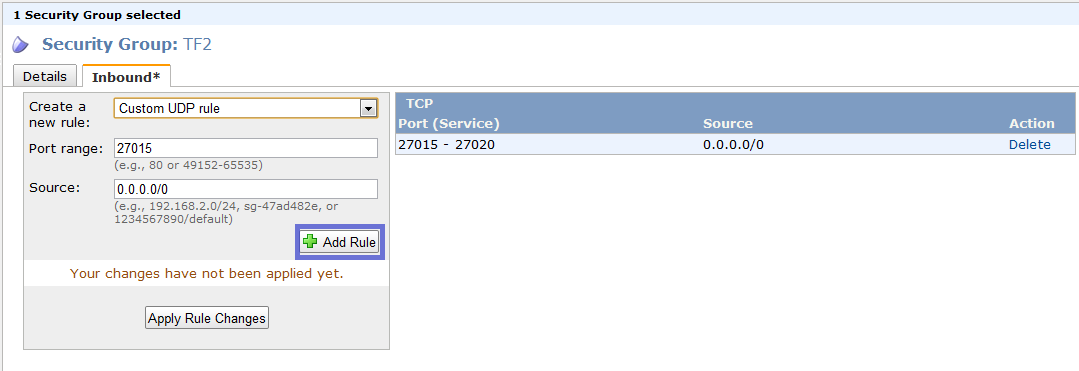
Then add a Custom UDP Rule and press “Add Rule”:
Finally, click “Apply Rule Changes”:
Now you can select this Security Group on all of your instances!