Prerequisite: Sign up for Programmatic Billing Access
The first thing we need to do is sign up for Programmatic Billing Access, so we'll have data for the service to process. We'll walk through how to get it set up, but more can be read about it in Amazon's documentation: Programmatic Billing Access.
The first step in this process is to go to the AWS homepage at http://aws.amazon.com/. And go to Sign In to the Console.

We need to log in to our AWS Account.

And once in the console, we will want to go to S3.

And create a new bucket.

We'll need to give our bucket a name.

For this example we'll use billing-example, but remember to replace billing-example with your bucket's name as we go along. Then click the Create button.

And our bucket is now created, but it's not done being setup; we'll get back to that shortly.

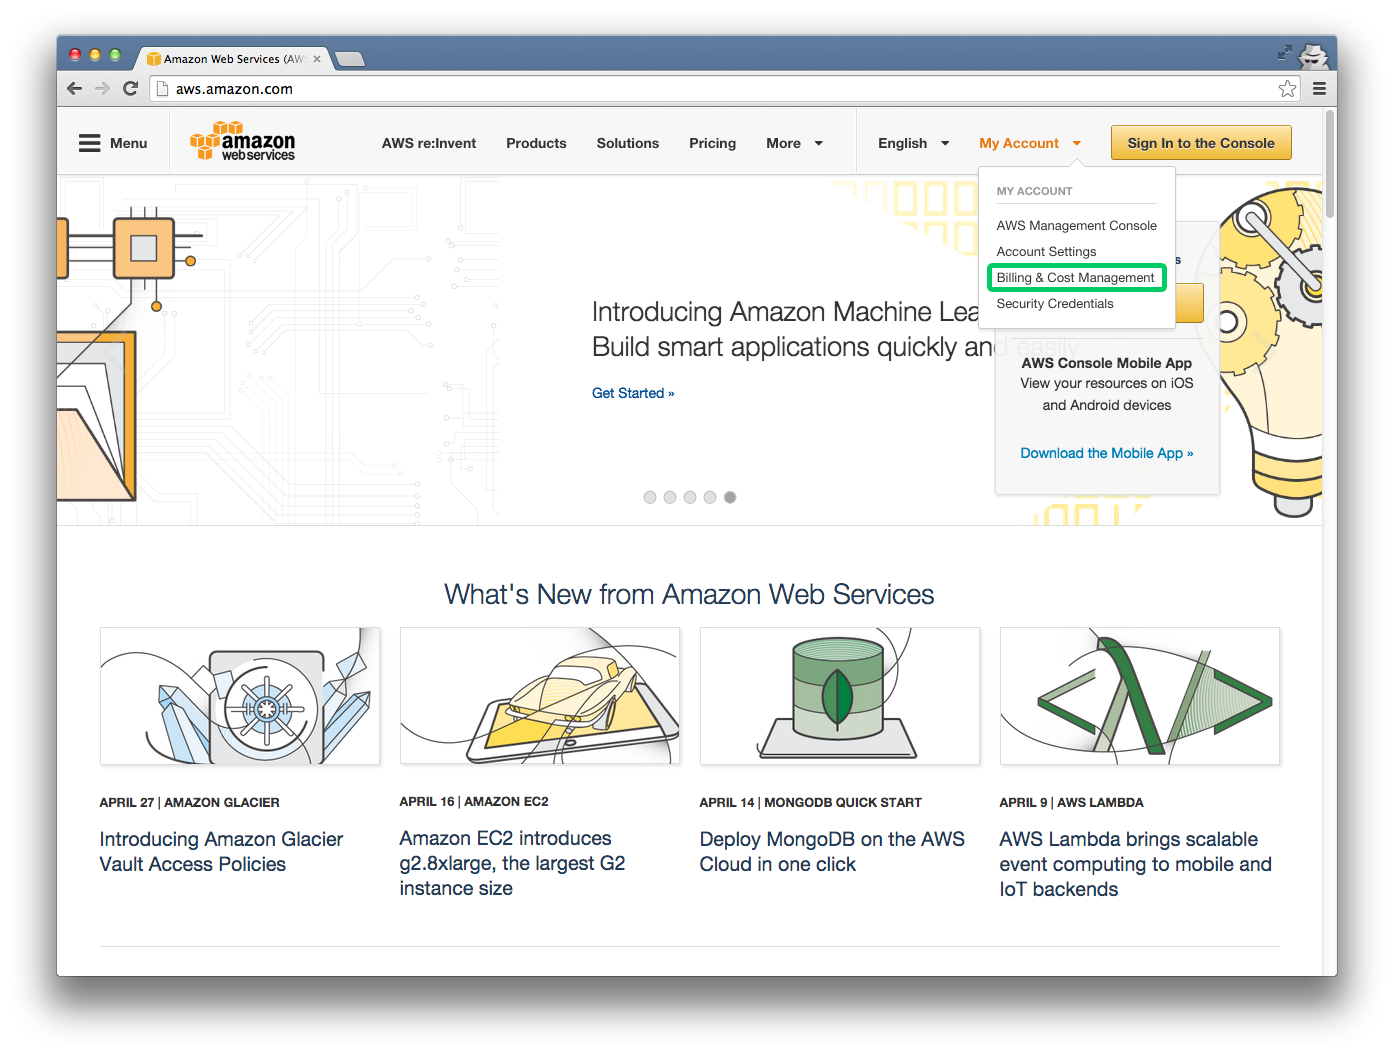
Go back to the AWS homepage, http://aws.amazon.com/. And go back to My Account.

But this time we'll go to Billing & Cost Management.
We'll go to the Preferences link on the left hand side.
Note The Preferences page is not accessible to IAM users. You will need to be signed in using the root account credentials.

And we'll click on Receive Billing Reports checkbox.

Next we'll put our bucket's name in Save to S3 Bucket and click on the sample policy link.

This will give us a sample policy to put on our bucket so that Amazon will be able to write our billing information into our bucket.

Here it is for billing-example, but make sure to use your bucket name instead, or just copy the sample policy Amazon provided.
Sample Policy for billing-example
1
2
3
4
5
6
7
8
9
10
11
12
13
14
15
16
17
18
19
20
21
22
23
24
25
26
27
28
29
{
"Version": "2008-10-17",
"Id": "Policy1335892530063",
"Statement": [
{
"Sid": "Stmt1335892150622",
"Effect": "Allow",
"Principal": {
"AWS": "arn:aws:iam::386209384616:root"
},
"Action": [
"s3:GetBucketAcl",
"s3:GetBucketPolicy"
],
"Resource": "arn:aws:s3:::billing-example"
},
{
"Sid": "Stmt1335892526596",
"Effect": "Allow",
"Principal": {
"AWS": "arn:aws:iam::386209384616:root"
},
"Action": [
"s3:PutObject"
],
"Resource": "arn:aws:s3:::billing-example/*"
}
]
}
We'll go back to S3, and we'll right click on our bucket.

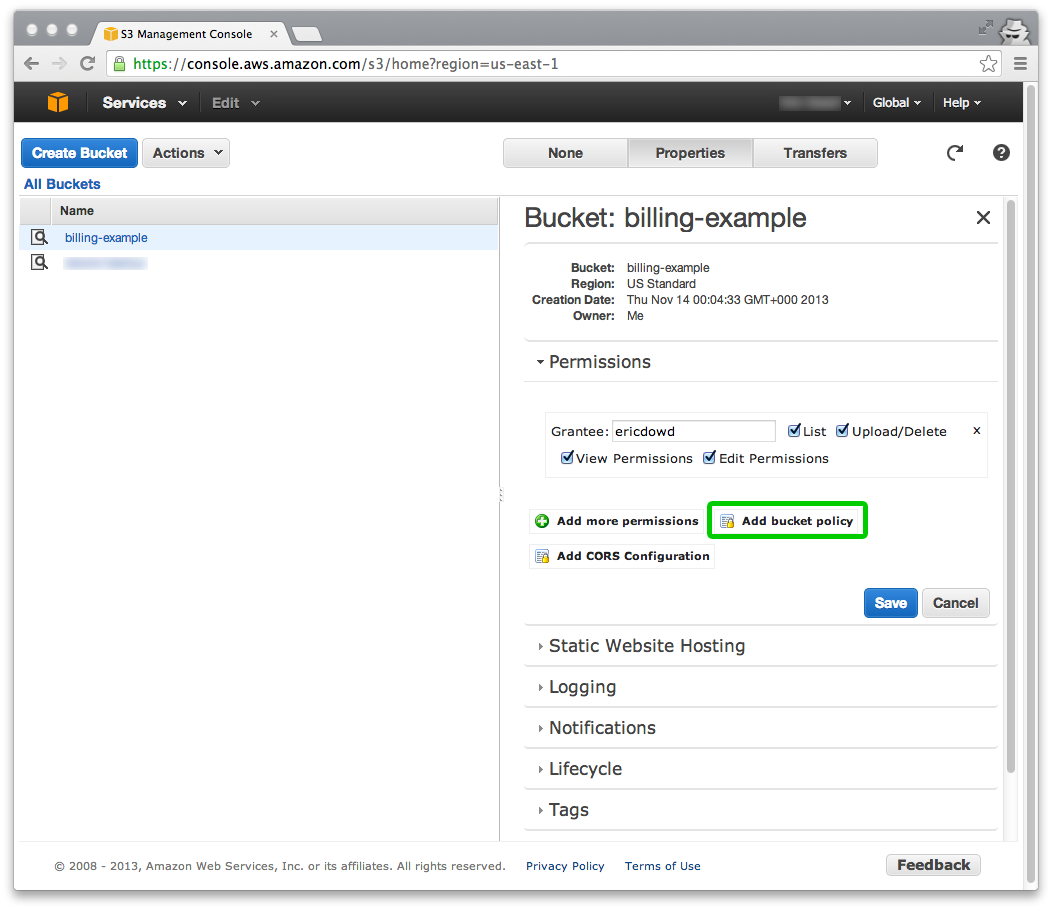
This brings up a contextual menu, we'll click on Properties.

The bucket policies are set under Permissions, so click on it to expand it.

Once we've expanded Permissions, click on Add bucket policy to add our new policy.
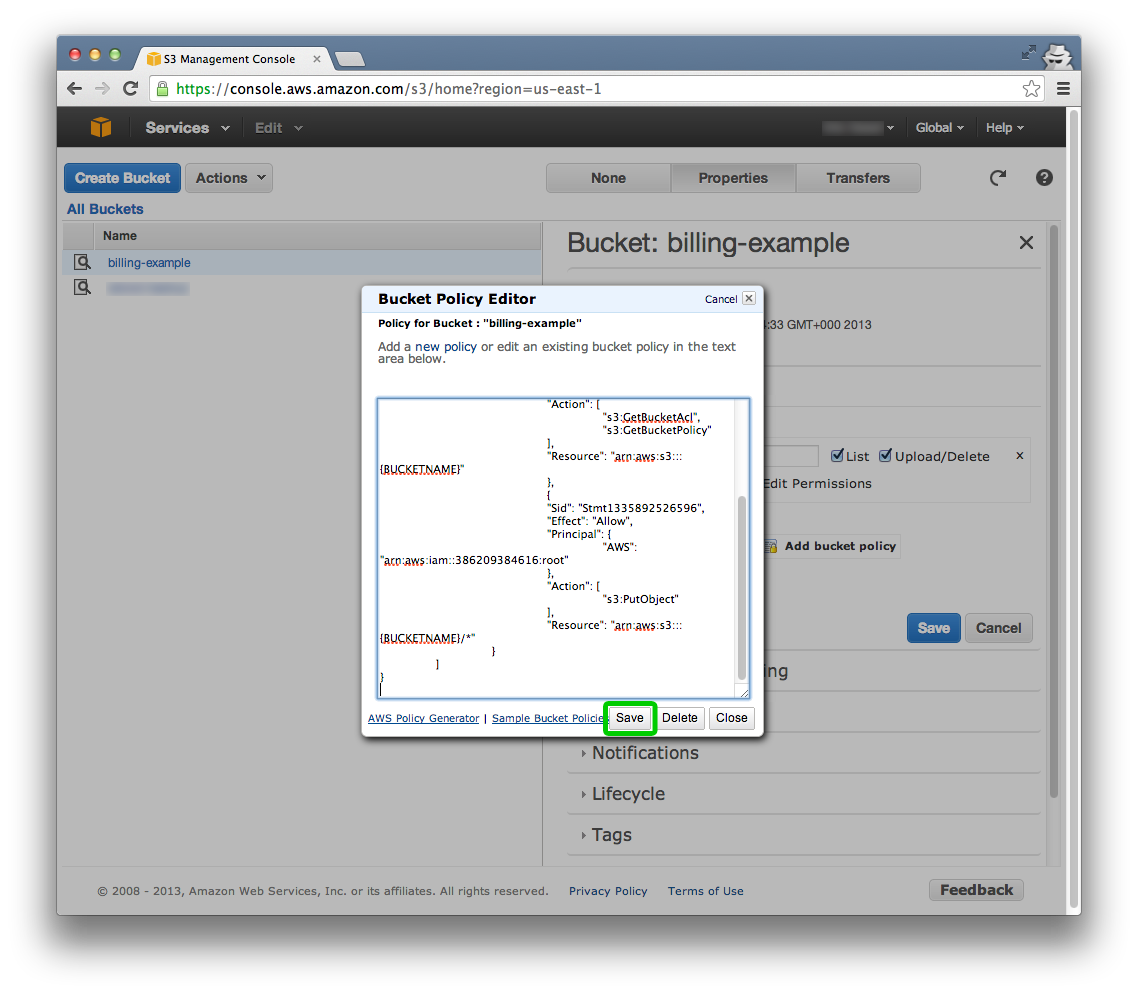
Click in the text area, and paste the policy.

Click Save and finally our bucket should be set up.
Going back to billing preferences, we'll click Verify to have Amazon check that they can indeed write to the bucket.

Now we'll choose the reports we are interested in. For now we'll choose them all.

Click on Save preferences and we will now be signed up for all the reports.

Let's got back to S3 for a moment and click on our bucket to open it.

If the programmatic billing access signup was successful, there should be an object in there named aws-programmatic-access-test-object.
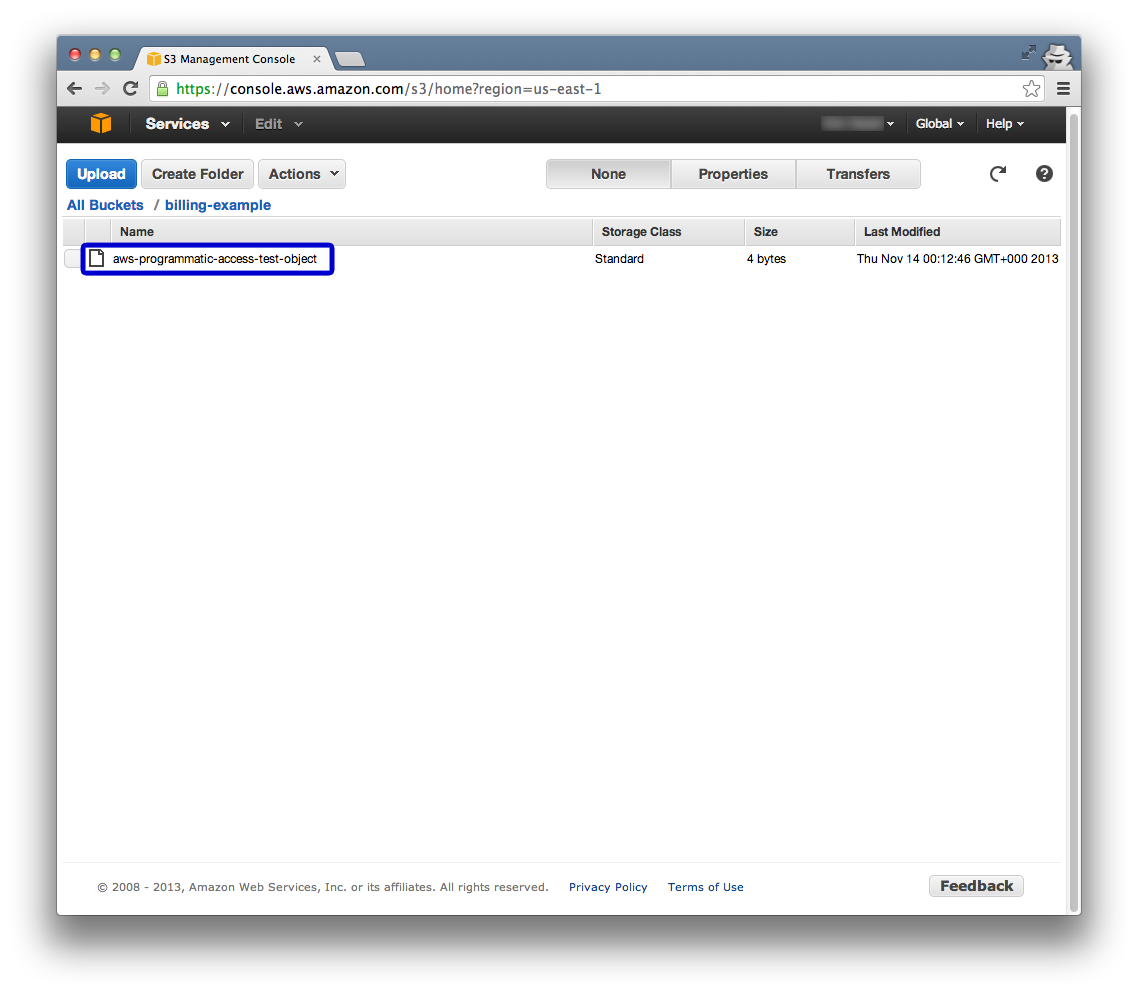
And eventually we'll see our billing data show up.

Congratulations, you've signed up for Programmatic Billing Access.