HowTo: Using PuTTYgen and Pageant on Windows
This how to will describe how to use PuTTYgen to convert Amazon Web Services Key Pair files (.pem) to the PuTTY Private Key file (.ppk) After that it will explain how to load this key file into Pageant so you don’t have to remember where you saved it in the future.
To follow this guide you’re going to need to download the Windows installer for everything except PuTTYtel and install it. You could download the files you need individually, but as you follow the How To book on our site you’ll discover we use most of the tools extensively. You’re also going to need a Key Pair file from Amazon Web Services. This is the file you downloaded when you started your instance. If you don’t want to use that one, or don’t already have one, you can create one for this guide on the Security Credentials page on Amazon’s site.
Let’s start with converting the Key Pair file for use with PuTTY’s tools:
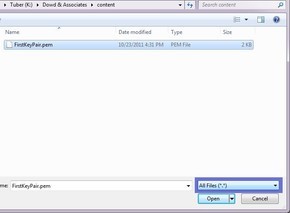
You want to start a program called “PuTTYgen”, the PuTTY Key Generator. This will convert the Key Pair we downloaded earlier to the proper file type for PuTTY to use. After loading PuTTYgen, click “Load” and navigate to your downloaded .pem file (mine was named FirstKeyPair.pem). Be aware that you have to select “All files” in order to see the .pem file, it defaults to .ppk, which isn’t what we have:
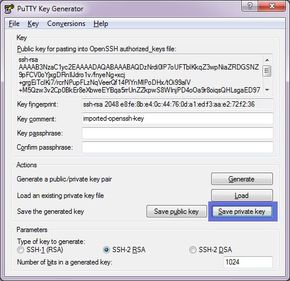
After you click “Open” and “OK” on the following dialog, you should see a screen to the following; you want to click “Save Private Key”; it will say that you haven’t set a passphrase, just dismiss the dialog by clicking “Yes”. Save your file with the proper extention (“.ppk”) someplace that you can remember:
Go ahead and close PuTTYgen now.
Next, we’re going to set up Pageant to use this PuTTY Private Key file in the future.
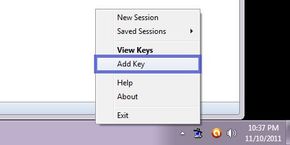
First, start Pageant up. It loads into your task bar, so after you find it, right click the icon and pick “Add Key”:
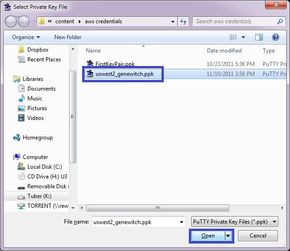
Navigate to where you saved your .ppk file in the last section, and click “open”:
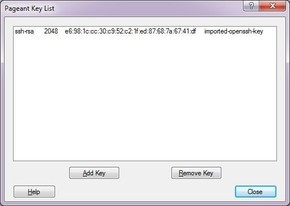
You can verify that the key is loaded by right clicking Pageant’s icon again and selecting “View Keys”:
And that’s it, we’re done!