HowTo: Repair Windows 7 Install After Replacing Motherboard
So you’ve installed a new motherboard and now your existing, installed copy of Windows 7 won’t boot, failing somewhere before the logo finishes displaying with a quick blue screen? Well here’s one way to fix it.
You will need:
- Your motherboard drivers. Use CPUID(CPU-Z) to find the model number if you don’t have it handy.
- The archive program “7-Zip” available from http://www.7-zip.org/ installed.
- A CD writer and a blank CD or a thumb drive or a USB hard disk
- Your Windows 7 install disc if you already tried the system repair option, or the system repair option on the Windows boot options screen if it is there.
- Another, working, computer.
Get your motherboard drivers downloaded from the manufacturer’s website. If you don’t know the model number you can use CPUID and locate the model number and manufacturer on the “Mainboard” tab:
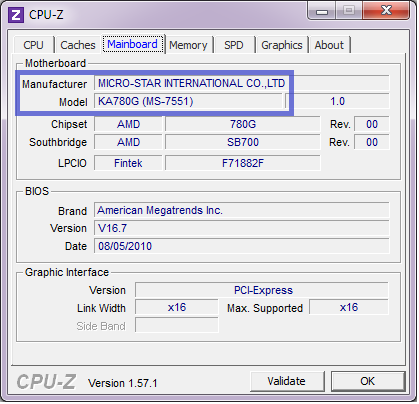
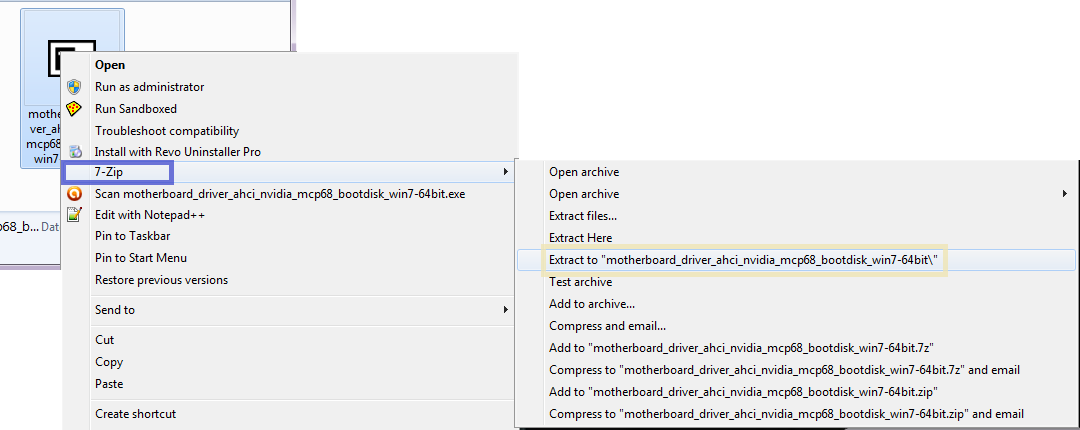
In this example, the manufacturer is MSI (Micro-Star International), so we can get the drivers by a quick Google search for “MSI Motherboard Driver Downloads.” The primary one you need is the IDE/AHCI/SATA driver files. After they’ve finished downloading, you need to extract them to a folder. You can do this by right clicking and selecting 7-Zip -> Extract to <Name of Driver Download>:
Copy the extracted folder to a CD, thumb drive, or external USB drive.
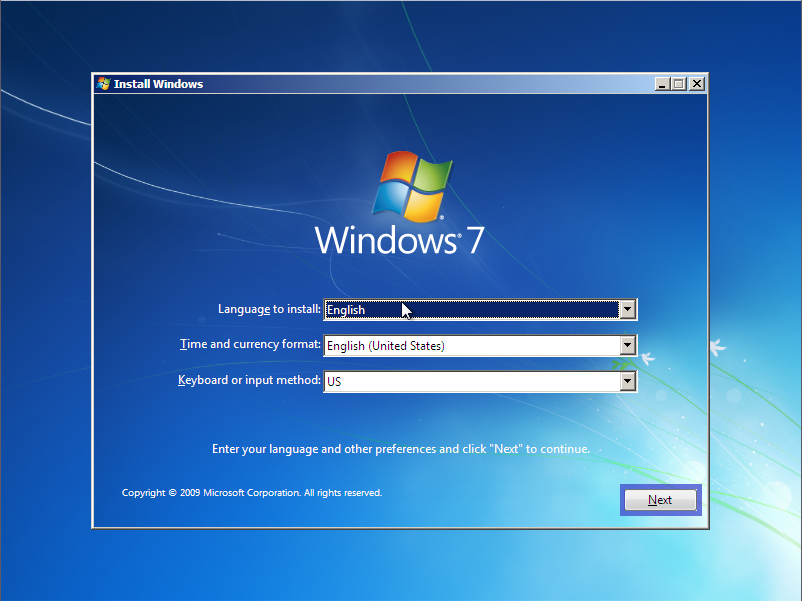
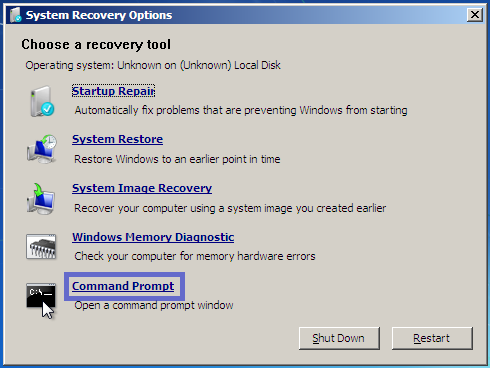
Go to the broken Windows 7 machine. Either load the system repair option or boot off your Windows 7 install disc. Once it boots, select your language and other things and hit next:
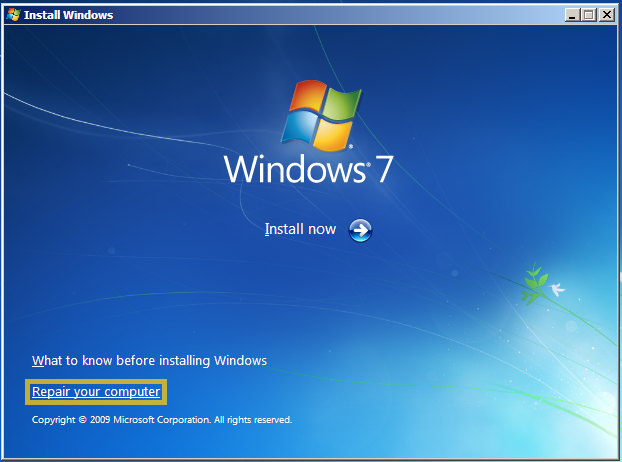
At the bottom of the window is an option that says “repair”, click this:
It will scan your drives, hopefully showing your Windows drive. If so, let it try to repair automatically at least once. Come back to this point if that fails. You can click “no” here, and it will drop back to the window that shows your Windows hard drive. Make sure the top radio button is selected and click next. It should bring up a list of links that you can click, the bottom one is “recovery console”, click that:
Eject the Windows disc and put in the CD you burned if you burned one. You need to figure out which drive your CD / thumb drive / external drive is - so try different drive letters and type dir until you see the one that has your folder. If you burned a CD, chances are it’s the D: drive (unless it was an HP or something, then it will be E:) if it’s a thumb drive or external hard drive and you only have 1 CD-ROM, it’s the E: drive. Maybe F: – check it out. We might add a guide on how to do this at a future date.
Once you have that figured out you need to type this
dism /image:c:\ /add-driver /Driver:X:\ /recurseReplace “X” with the drive letter from the previous step:
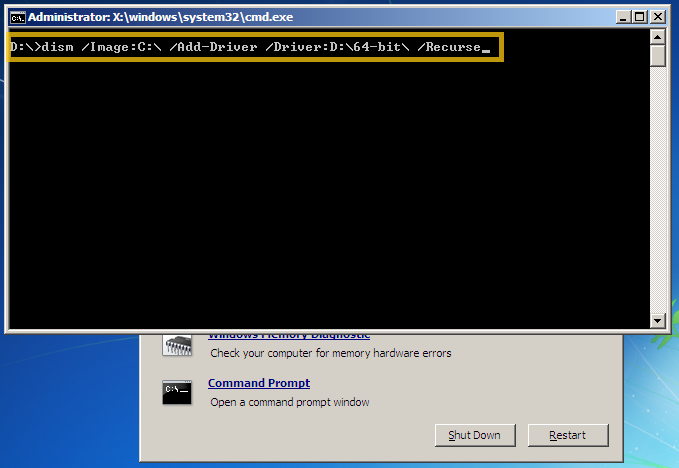
Hit enter and it should find the drivers you extracted into the folder in the second step.
After it does that, type “exit” and hit enter, then press the “Restart” button.
When Windows boots it will take a LONG time to get all the updated drivers - but hey, it booted, right?